We love our little 1960 home. Wood floors, brick entry, 10 (count em- ten) closets, one very wonderful sun room and a backyard. We feel like kings. We own trees!
As we've been setting up house (read: buying random stuff off of Craigslist to fill all the space), I realized that now we have this huge living room we needed something new... Our coffee table looked dinky... Our feet needed somewhere to go... We needed a ginormous ottoman.
This was what I envisioned:
Price tag: around $300-400
I pinned about 9 versions of this on Pinterest. I hoped. I dreamed.
I showed Evan and we decided the inevitable: since we can't afford it, we'll make it.
First step: buy cheap coffee table on Craigslist with cute legs. Cute legs and size were the only determining factors... this guys was u-g-l-y but only $25. Score.
Second step: buy fabric. This is where my all knowing mother-in-law came is super handy. I already have about 5 other fabrics working in this room so it was tricky... She took me to the fabric mecca in Dallas and I found a neutral with some color and a vintage vibe. Done.
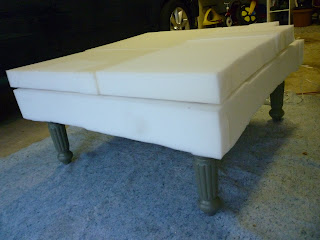
Third Step: Disassemble ugly coffee table and prep for transformation. Sand legs, paint the same gray-green as my mother-in-laws cabinets. Convenient and free.
Fourth Step: have wonderful husband cut ply wood to serve as a base. Oh and duct tape the odd little drawers that existed in the ugly table.
Fifth Step: Haul all parts and materials to mother-in-law's garage so that when the tricky parts or troubleshooting occur there is another brain besides mine involved in the decision making. We made the tufting buttons, cut the foam, covered with batting, and got to stapling. I won't go into the issues that almost stumped us, but this was a much bigger project than I originally thought it would be.
Sixth Step: Get those darn tufting button sewn on. We struggled to find a better (actually possible) way other than threading a super long needle through the holes we drilled beforehand, but after about 30 minutes of taking turns trying to get the needle back through the hole, we got smart. One skinny crochet hook got the job done.
Seventh Step: Scotch guard the crap out of it and enjoy!
If you really need a step by step, this girl did a great write up. DIY Tufted Ottoman.


